So what’s a “custom” domain? If you purchase a domain name that you can define yourself, that’s called a custom domain. The opposite of this might be a domain you receive from a service like WordPress.com or Blogger.com. Online publishing services that provide you with a domain name typically provide you with a “subdomain” underneath their own parent domain. For example, WordPress.com gives you a blog with the URL “yoursite.home.blog”. In this case, home.blog is the parent domain, and “yoursite” is your subdomain.
How to Set Up a Custom Domain
Before you can configure a domain name to point to your website, you need to buy one. The cheapest way to buy your own custom domain is to find one that isn’t taken yet. All domain registrars where you can buy a custom domain name provide a search feature for you to do this. The most popular and well-known domain registrars where you can search for and purchase a domain name include:
Domain.comGoDaddyNamecheapBuyDomains
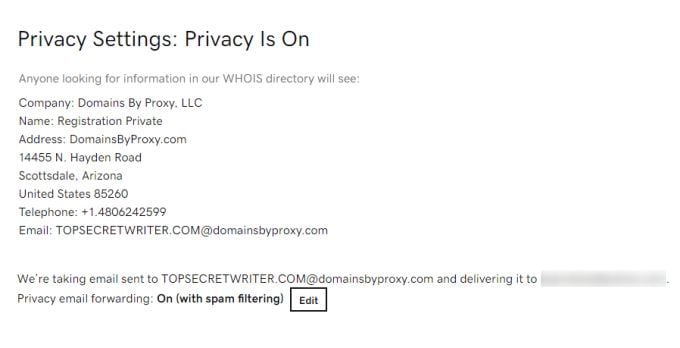
You can also usually purchase a custom domain from your web hosting provider as well, so that may be a good first place to check. Expect to pay about $9.99 to $24.99 per year for an available domain name. If you don’t want people looking up domain ownership from a service like ICANN or Whois Lookup, you can purchase what’s known as Ownership Protection or Domain Privacy. This is available for a small annual fee (usually from $2.99 to $7.99), and provides you peace of mind knowing that spammers or others won’t be able to obtain your email address or phone number.
How to Configure Your New Custom Domain
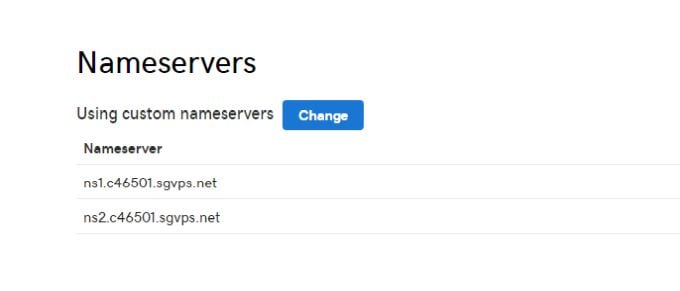
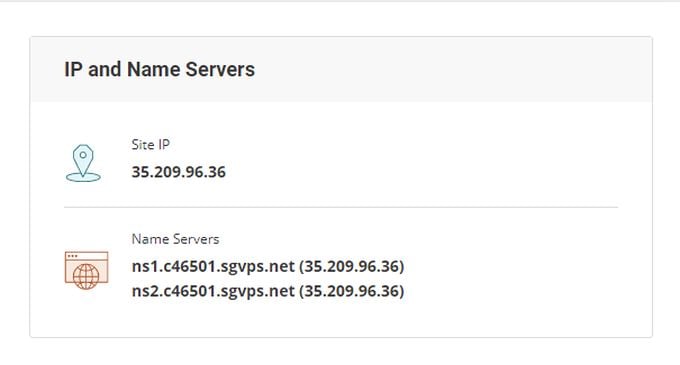
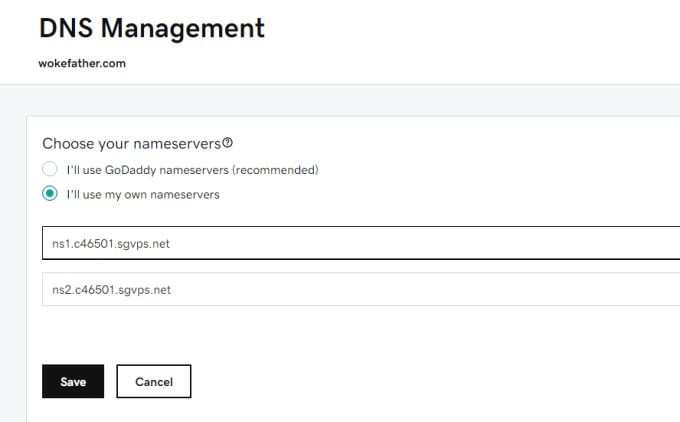
Once you’ve purchased your own custom domain, you still need to point it to the web server where your actual website is hosted. To do this, log into the account where you purchased your domain and find the Manage DNS settings for that domain. This will take you to an area where you can change the “custom nameservers” for your domain. Nameservers are the servers (typically provided by your web hosting company) that the domain registrar will refer web browsers to whenever anyone types your custom domain into their web browser. The web host’s name servers handle redirecting traffic to the correct server that hosts your website. How do you find the correct name servers for your web host? You can find them by logging into your web hosting account and navigating to your admin panel where “Site Information” is provided. Just look for the IP and Name Servers section and you should see the names of your web host’s two name servers. Make a note of these two name servers, then return to your domain registrar account and type those into the fields for your domain’s custom nameservers. Just Save the changes, and you’re done. Name server changes don’t usually take effect immediately. In fact, it can take up to 24 hours before the changes propagate across the internet. You can use a service like whatsmydns.net to check whether your domain’s IP address and DNS record information has propagated across the internet. Once this process is done, any time anyone types your new custom domain into their browser’s URL field, the browser will be directed to your web server where your website is hosted.
How and Why to Redirect a Custom Domain
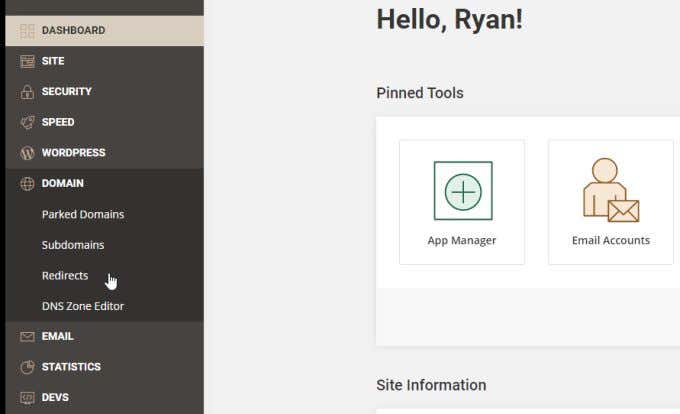
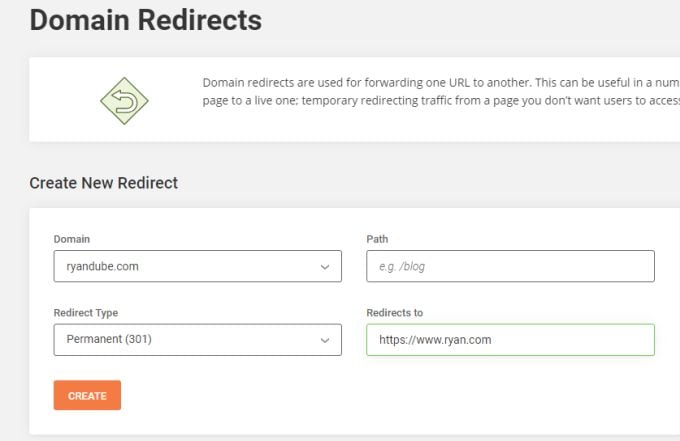
Redirecting a domain means telling the web host you’ve pointed the domain to, to redirect incoming traffic for that custom domain to a different one. There are important reasons you may want to redirect a custom domain. The most common reason for doing this is if you want to register slightly alternative spellings of your domain name so you can point them all to your main domain. This can help you recapture potentially lost traffic due to misspellings. For example, if you type “googel.com” into your web browser’s URL field, you’ll notice that the URL automatically changes to “google.com” and takes you to Google’s search engine. This is because Google redirects “googel.com” to “google.com”. To do this, register the custom domain with the alternative spellings, and follow the same steps above to point that custom domain to your web server using the correct name servers. Then, log into your web hosting account and find the menu option for Redirects. You’ll see a window where you can select the original (typically misspelled) custom domain you registered. Then in the Redirects to field, you can specify what URL you want the web host to redirect that custom domain’s traffic to. Keep in mind that you can type any URL at all, even if you don’t own it. For example, you could redirect your custom domain to “google.com” if you wanted to. There wouldn’t be much sense to it, but this is how redirects work. You’re not redirecting directly to the web server location where your website files are. Instead, you’re sending incoming visitors to the URL, which will then deliver them ultimately to the web host location.
Other Uses for a Custom Domain
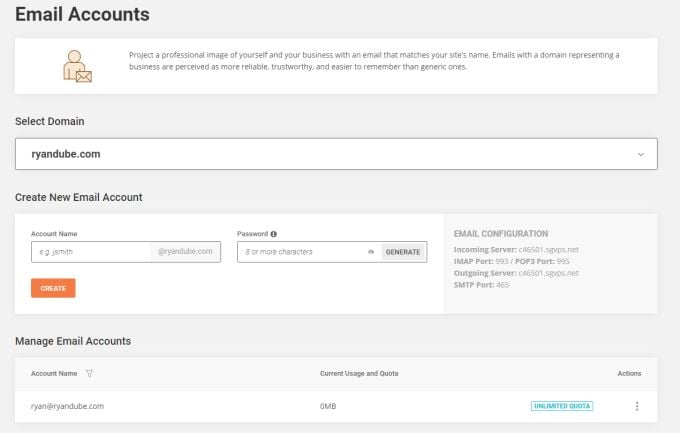
Another useful benefit of registering and redirecting a custom domain is that you can also create your own email address that contains that custom domain. For example, if you create a custom domain for a profile website using a domain with your own name, you can then create an email address with your own name. To set up such an email, you first need to redirect the custom domain to your web host using the steps above. Then, log into your web host account and select Accounts in the Email menu (the menu itself might be slightly different). Here you can create any email account you like. For example, with my registered domain name of ryandube.com, I can create the email account, ryan@ryandube.com. A custom domain name lets you create your own email accounts using your own domain ending to the email. For many people, this is enough benefit to register a custom domain, even if they don’t host a website to redirect it to. Whatever your reason for registering a custom domain, as you can see it’s easy to do and useful to have.


